Why Professional AC Repairs Save You Time and Money

Why Professional AC Repairs Save You Time and Money
In a fast-paced world, staying cool during searching summers is important. Your air conditioner is essential in keeping your home or office comfortable. However, like any equipment, AC gadgets may additionally come upon problems over the years. While it might be tempting to try solving the problem yourself, hiring expert AC restore offerings is the smarter choice. Here’s an in-depth study of why professional AC upkeep prevents each money and time. ac repair.
Expert Diagnosis and Efficient Repairs
One of the principal advantages of hiring specialists is their expertise. Certified AC technicians have widespread schooling and enjoy, permitting them to diagnose troubles and offer powerful answers. AC services. DIY attempts frequently cause trial and error, losing time and probably worsening the problem. Professionals get it properly the primary time, restoring your cooling machine directly.
When you try maintenance without sufficient know-how, you can misidentify the basic motive of the trouble. This regularly results in temporary fixes that do not fully cope with the issue. Professional technicians use superior diagnostic equipment to pinpoint the precise hassle and provide everlasting solutions. This degree of understanding ensures that your AC gadget operates effectively and reliably. ac repair services.
Prevent Costly Mistakes
Attempting to repair your AC without proper understanding can lead to steeply-priced mistakes. You may additionally by chance harm delicate components or overlook critical problems. ac repair services in pune. These mistakes can result in extra steeply-priced repairs or even the need to replace the complete unit. Professional technicians cope with the maintenance with precision, preventing useless prices.
Imagine trying to repair an electrical fault in your AC system without understanding the wiring diagram. A single incorrect connection could damage the circuit board, leading to an expensive replacement. air conditioner repair. Professionals follow industry best practices to avoid such mistakes, saving you from costly repairs.
Access to Specialized Tools and Parts
AC repair requires specialized tools and genuine replacement parts that professionals have access to. Using the right tools ensures accurate repairs and prevents further damage. air conditioner repair services. Additionally, professionals can source authentic parts directly from manufacturers, ensuring the longevity of your AC system.
Without the right equipment, even an easy repair can end up complicated. For example, refrigerant dealing with calls for particular gauges and restoration equipment. Attempting to top off or update refrigerant without the right tools may be dangerous and can violate environmental rules. air conditioner services. Professional technicians come prepared with the necessary gear to perform repairs correctly and efficaciously.
Long-Term Savings Through Preventive Maintenance
Many professional repair offerings provide upkeep plans that help maintain your AC in pinnacle condition. air conditioner services in pune. Regular renovation prevents small problems from turning into main troubles, reducing the likelihood of high-priced breakdowns. Well-maintained AC systems additionally perform more correctly, decreasing electricity bills.
Preventive maintenance includes duties consisting of cleaning the evaporator and condenser coils, checking refrigerant tiers, and inspecting electrical connections. ac service centre. These ordinary tests make certain that your AC machine functions optimally, reducing put-on and tear. Over time, this proactive method saves you cash by extending the lifespan of your unit and minimizing repair charges.
Warranty Protection
If your AC unit is below the guarantee, attempting DIY repairs can void the warranty. Professional technicians follow producer recommendations, ensuring that your assurance stays legitimate. air conditioner service centre. This can save huge money in case of future repairs or replacements.
Warranties frequently have particular phrases and conditions that require maintenance to be finished by authorized technicians.ac re[pair near me. By hiring professionals, you guard your investment and preserve the coverage furnished via the warranty. This can be specifically beneficial if a main component, including the compressor, needs replacement.
Time-Saving Convenience
When you hire experts, you unfasten yourself from the problem of diagnosing and solving the hassle. Instead, you could recognise your day-by-day sports even as experts take care of the maintenance. Ac repair near me. Many expert services additionally offer flexible scheduling and activate carriers, minimizing disruptions.
Time is a precious aid, and attempting DIY maintenance can devour hours or even days. Professional technicians work successfully to repair your AC machine, permitting you to get lower back to your ordinary without unnecessary delays. Some corporations even provide equal-day service for urgent repairs, ensuring minimal downtime.
Enhanced Safety
AC structures involve complicated electrical additives and refrigerants that require cautious coping. DIY maintenance can pose protection risks, which include electric shocks or exposure to dangerous chemicals. Professional technicians are educated to deal with these dangers accurately, shielding you and your family.
Refrigerants, in particular, require cautious management because of their capacity to impact the environment and fitness. Ac repair near me. Technicians are licensed to manipulate refrigerants in compliance with regulations, making sure that upkeep is conducted properly and responsibly. This degree of safety assurance is invaluable for owners.
Boosted System Efficiency and Lifespan
Proper maintenance and upkeep by experts ensure that your AC operates at high efficiency. This now not only makes your private home comfortable but also extends the lifespan of the unit. Investing in professional maintenance pays off using delaying the need for a highly-priced replacement.
A correctly operating AC device consumes much less strength, resulting in decreased application bills. Over time, the cost of financial savings from stepped-forward electricity performance may be substantial. Additionally, regular preservation facilitates prevent the most important breakdowns, lowering the want for high-priced repairs.
Environmentally Friendly Practices
Professional AC restoration services regularly observe environmentally friendly practices. They ensure that refrigerants are dealt with and disposed of properly, minimizing environmental impact. Additionally, maintaining your AC device’s efficiency reduces power consumption, contributing to a greener planet.
By deciding on professional repairs, you no longer best keep money however also play a function in protecting the surroundings. Technicians can propose energy-green enhancements and offer pointers on how to lessen your carbon footprint.
Tailored Solutions for Your Needs
Every AC machine is unique, and expert technicians understand this. They offer tailor-made solutions based on the precise desires of your unit. Whether it is a critical AC system, split unit, or window AC, professionals have the expertise to address extraordinary types of structures.
This personalized technique guarantees that your AC system gets the care it needs to function optimally. Technicians also can provide tips on the way to improve your gadget’s performance and recommend improvements if important.
Peace of Mind
Perhaps one of the enormous benefits of hiring expert AC restore offerings is the peace of thought it brings. Knowing that your cooling device is in the hands of specialists permits you to relax and experience cushy residing surroundings.
DIY repairs can be demanding and time-consuming, mainly if unsure about the final results. Professional technicians take the weight off your shoulders, imparting reliable answers you can trust.
Conclusion
Choosing expert AC repair services is smart funding that saves you time, money, and strain. From professional analysis to preventive preservation and protection assurance, the advantages are clear. The next time your AC wishes interest, accept as true with the experts to keep your cooling device strolling easily and efficiently. By doing so, you will experience a cushy and fear-unfastened environment whilst making the most of your investment.
How to handle Your Microwave: The User’s Guide for longlasting microwave

Microwaves are very essential appliances when it comes to nowadays kitchen. They serve and deliver with ease and efficiency, but to have a long life for your microwave and to perform at its best it requires its share of proper care. Here is a comprehensive guide that explains everything you need to know about maintaining a microwave-from cleaning tips, common issues, and preventive measures that extend the life of your microwave.
1. Knowledge of how microwave oven works
Those who use microwave ; should need to have basic idea of how to use it properly as well as clean it properly . The important parts are as follows:
Magnetron: This is the microwave oscillator. It produces microwaves.
Turntable: This helps the food to get evenly heated.
Control Panel: It enables the selection of time and power level for the user.
Door Seal: Leakage proofing against the radiation is ensured by it.
These components are supposed to be well maintained in order to operate satisfactorily.
2. Maintenance through Regular Cleaning without Damages
Cleaning a microwave is very simple, but one of the most effective jobs in maintenance. Food spills, grease, and stains may cause odor, bacterial buildup, and damage to inner parts.
Cleaning the Microwave Interior
Steps in Steaming Cleaning : Put a bowl of water with lemon slices inside the microwave oven for 5 minutes. The dust loosened then easy to remove by wiping off.
Apply baking soda or vinegar on any stains and odour conditions
Do not use strong chemicals as it might damage the inside parts of your microwave oven.
Cleaning the Outside
Wipe the exterior of the control panel with the microfiber cloth.
Dust the vents to improve airflow. Do not overload, since it can overheat.
Wash the turntable with warm, soapy water.
3. Right Use Prevents Damage
Most people misuse their microwaves, though unware of the same. Follow the best practices given below:
Using microwave-safe containers. Avoid using metal and plastic since they tend to melt.
Do not leave the microwave empty. It harms the magnetron.
Do not shut the door harshly. This will strain the safety interlock system.
Tune in the appropriate quantity of power. A charring in the food can put tension in the inside parts.
Cover the food such that splatters and stains do not emerge.
4. Check and Service the Key Parts
Some of the major parts that need to be checked in a microwave include some of the following:
Door Seal and Hinges
The door should close tight enough to avoid leakage of radiation.
Inspect cracks or gaps and replace seals when damaged.
Turntable and Roller Ring
Clean the turntable and ensure that it is correctly aligned.
Determine if the roller ring rotates smoothly.
Filters and Vents
Some microwaves contain grease filters which need cleaning.
Make sure ventilation openings are open so that overheating does not occur.
5. General Microwave Problems
Common microwave problems and their troubleshooting:
Microwave does not heat
Inspect power source
Check for door to close fine
Discuss malfunctioning magnetron with service technician
Noise or Sparks is Odd
Do not allow any metal into the microwave
6. Preventive Maintenance Tips
Regular servicing will make microwave long-lasting as well as operational:
- Inspect the cord for frays or damage
- Ensure your microwave is dry to avoid electrical issues.
- Take it to a professional every year for inside check-ups.
7. When To Replace Your Microwave
A microwave that is well serviced can last for 10 years. But if you experience any of the following:
Breakdowns in succession
Buzzing noise
Food is taking much longer than usual time to get cooked
A constant and heavy smell or smoke
You may need a new microwave
Conclusion
In this way, you ensure that the microwave will be there for much longer periods of its use and works at its level as well. Its regular cleaning, proper usage, and repairing itself will only get you the best output from an appliance. When you feel even serious malfunctions in your microwave, then in that case don’t forget contacting a professional microwave service repairing agency and otherwise it would do worse.
install water purifier home india

How to Install a Water Purifier at Home: A Step-by-Step Guide for Every Indian Household
Clean water is the backbone of a healthy home, and installing a water purifier is no longer optional in India—it’s essential! But let’s face it, the idea of setting up a purifier can feel overwhelming, especially if you’re not a tech expert. Worry not! This guide breaks down the installation process into simple, ghar-ghar friendly steps. Whether it’s an RO, UV, or gravity-based purifier, we’ve got you covered!
Before You Begin: Tools You’ll Need
Gather these basic tools (most come with the purifier kit):
- 🔧 Allen keys or screwdrivers
- 🚰 Teflon tape (to prevent leaks)
- 🔌 A drill (for wall-mounted purifiers)
- 🧻 A clean cloth (for wiping spills)

Step 1: Choose the Perfect Spot
Where to install?
- RO/UV Purifiers: Near your kitchen sink, where electricity and water supply are easily accessible.
- Gravity-Based Purifiers: On the kitchen counter or a sturdy shelf (no electricity needed).
Pro Tip: Avoid direct sunlight or damp corners to protect the purifier’s lifespan.

Step 2: Shut Off the Water Supply
Safety first! Turn off the main water valve under the sink. If you’re connecting to a direct pipeline (like a borewell), use the bypass valve provided in the kit.

Step 3: Install the Water Purifier
Follow these steps based on your purifier type:
For RO/UV Purifiers:
- Mount the Unit: Fix the purifier on the wall using screws (mark holes with a pencil first).
- Connect the Inlet Pipe: Attach the blue pipe to your water source (tap/pipeline) using the saddle provided.
- Attach the Outlet Pipe: Connect the black pipe to the purifier’s outlet and place the other end in the sink for wastewater.
- Plug In the Power: Ensure the socket is dry and has earthing to avoid shocks.
(Check👉 Is Reverse Osmosis Water Safe for Drinking?)
For Gravity-Based Purifiers:
- Assemble the Filters: Fit the upper and lower chambers as shown in the manual.
- Fill the Top Tank: Pour water into the upper tank. The gravity flow will push it through the filter.
- Collect Clean Water: Let the filtered water collect in the lower chamber—ready to drink!
(Check👉 Graphite filter and its role in the purification of water)

Step 4: Check for Leaks
Turn on the water supply and power. Check all joints and pipes for leaks. Tighten connections with Teflon tape if needed.

Step 5: Flush the System
Before using the purifier:
- Run 2–3 liters of water through it to wash out carbon dust or residue from new filters.
- Discard this water—don’t drink it!
Step 6: Test the Water
Use a TDS meter (for RO) or a simple taste test to ensure your purifier is working perfectly.

When to Call a Professional
If you’re unsure about plumbing, electrical connections, or face issues like low water pressure, it’s best to book a technician. Brands like Kent, Aquaguard, and Livpure offer free installation services!
Common Mistakes to Avoid ❌
- Ignoring the Manual: Each purifier has unique steps—follow the manual carefully.
- Skipping the Flush: First-time use water may contain impurities—always discard it.
- Overlooking Wastewater: RO systems drain wastewater—use it for mopping or gardening.
Maintenance Tips for Longevity
- 🔄 Replace filters every 6–12 months (check the manual).
- 🧼 Clean the storage tank monthly with mild detergent.
- 💡 Service UV lamps annually for effective purification.
Why Bother Installing a Purifier?
In India, where tap water can contain hidden dangers like bacteria, pesticides, or heavy metals, a purifier is your family’s health shield. Imagine sending your kids to school with a bottle of safe water or brewing kadak chai with pure water—it’s peace of mind in every drop!
(Check👉 Water Pollution in India)
Final Thought: You’ve Got This!
Installing a water purifier is easier than making perfect gulab jamun—just follow the steps! Whether you’re a busy mom, a student in a PG, or a grandparent, clean water is a right, not a luxury. Take charge today and sip your way to a healthier tomorrow.
Need help? We’re here to guide you! 🙋
Top 10 Tips for Geyser Maintenance at Home

Top 10 Tips for Geyser Maintenance at Home
Geyser maintenance is important for both efficiency and longevity. Here are 10 tips that can help keep your geyser running smoothly, save you money on energy bills, and ensure always have hot water when you need it.
1. Regularly Check the Temperature Setting
One of the simplest steps in geyser maintenance is to regularly check the temperature setting. Ideally, the temperature should be set to around 120°F (49°C).
- Higher settings can increase energy consumption and lead to scalding.
- Lower settings may not heat the water sufficiently.
Checking it every few months can save you energy and keep your home safe.
2. Flush the Tank
Flushing your geyser helps remove sediment buildup, which can decrease efficiency and shorten the lifespan of your appliance.
- It’s recommended to flush the tank every six months.
- To do this, turn off the power and cold water supply, then attach a garden hose to the drain valve and let the water flow until it runs clear.
- Keeping the tank clean helps maintain a steady heat supply and reduces wear on the heating element.
3. Clean Filters
Your geyser may have filters that remove impurities from the water. Keeping these filters clean ensures optimal performance.
- The frequency of cleaning depends on your water quality.
- Simply remove and rinse them under running water to keep them free from debris.
A clean filter not only improves efficiency but also enhances water quality.

4. Inspect the Heating Element
The heating element in your geyser is critical for providing hot water. Regular inspection can prevent issues.
- Check for signs of corrosion or mineral buildup.
- If the element is covered in scale or not heating efficiently, it may need to be replaced.
By keeping an eye on this part, you can prevent unexpected hot water shortages.
5. Ensure Proper Ventilation
Proper ventilation is vital for gas geysers, as inadequate airflow can cause dangerous carbon monoxide buildup.
- Check the venting system to ensure it’s clear of obstructions.
- Installation of a carbon monoxide detector in the home can also provide peace of mind.
Safety first! Don’t hesitate to consult a professional if you find any ventilation issues.
6. Prevent Leaks
Leaks can lead to significant water damage and increase your bills. Regularly inspect your geyser and its connections for any signs of leaks.
- Look for moisture around the base and in connections.
- Tighten any fittings that appear loose and replace any damaged parts promptly.
Catching a small leak early can save you from a big headache later.
7. Test the Thermostat
A malfunctioning thermostat can lead to inconsistent water temperatures. Testing it regularly can help avoid surprises.
- To test, simply adjust the temperature setting and wait for it to reach the desired level.
- If it doesn’t respond as expected, it may need calibration or replacement.
Knowing your water temperature can improve comfort and safety in your home.
8. Insulate Pipes
Insulating your geyser pipes can help maintain the temperature of the water and reduce energy costs.
- Use foam insulation sleeves or fibreglass insulation to cover the pipes, especially those located in unheated areas.
- This can help prevent heat loss and keep your water hot longer.
Your energy bills will thank you!
9. Schedule Professional Servicing
While there are many Geyser maintenance tasks you can handle yourself, scheduling professional servicing is wise.
- A qualified technician can perform deeper inspections and repairs that you may not be able to do yourself.
- Aim for a professional checkup once a year to address any hidden issues.
This will keep your geyser in peak condition and can even help with warranty requirements.
10. Keep an Eye on Age and Condition
Like all appliances, geysers have a lifespan. If your geyser is nearing the end of its life, be mindful of its condition.
- Most geysers last about 8 to 12 years. If yours shows signs of wear, consider a replacement.
- Look for leaks, corrosion, and increased energy bills as potential indicators.
A new geyser can provide peace of mind and improved efficiency.
Incorporating these tips into your routine Geyser maintenance can make a significant difference in the lifespan and efficiency of your geyser. A little effort can go a long way to ensure that your home stays comfortable and your water stays warm. So, take a moment to check your geyser and implement these friendly tips today!
10 Signs Your AC Is Urgent – Don’t ignore these warning signs
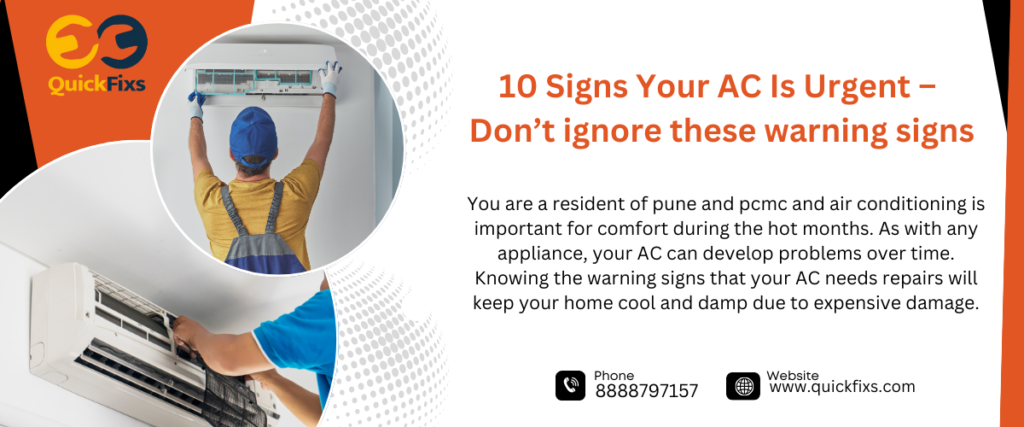
10 Signs Your AC Is Urgent – Don’t ignore these warning signs
You are a resident of pune and pcmc and air conditioning is important for comfort during the hot months. As with any appliance, your AC can develop problems over time. Knowing the warning signs that your AC needs repairs will keep your home cool and damp due to expensive damage. AC repair services.
10 Vital Signs That Your AC Is Immediately Needed
1. Hot air flows from the vent
A common sign that your AC is broken is when it blows hot air instead of cold. This is a faulty compressor and thermostat issue. If you are facing this problem in Pune, Pimpri-Chinchwad, you should immediately contact an AC repair specialist to avoid other damage.
2. Poor ventilation in your home
If you notice poor airflow from your drain, it can indicate a filter or faulty motor. Poor ventilation not only makes your home look less attractive, it also contributes to higher energy costs. Residents of Baner or Pimple Saudagar can rely on our fast AC repair service to solve this problem quickly.
3. Strange noises coming from your AC
The buzzing and grinding noise of your air conditioner should never be ignored. These noises could indicate loose components, a broken fan blade, or a faulty motor. If you hear an unusual sound in your AC unit in Pune, PCMC area, schedule an appointment with a professional technician.
4. Bad smell coming from the AC
A damp or musty smell coming from your AC is a big problem. It could indicate mould growth in the pipe or electrical issues in the appliance. Timely AC repair in Pune. You can ensure that the air in your home is fresh and healthy.
5. Bicycle transportation and parking daily
Does your AC turn on and off more often than usual? This behaviour, known as short cycling, can upset your unit and shorten its life. The most common causes are a broken thermostat, dirty condenser coils and an oversized unit. Call your local AC repair technicians in pune to find the problem and fix it before it gets worse.
6. Higher energy costs with less consumption
Have you noticed a sudden increase in your electricity bill even though you do not use the AC as often? This could indicate that your AC is working harder than necessary due to underlying problems. For Wakad Pune residents, regular AC service can help improve efficiency and reduce energy costs.
7. Leaks or water around the unit
If you see water collecting around your AC unit, it may be a sign of a clogged liquid duct or a refrigerant leak. Ignoring this can lead to water damage to your home. Residents of [local town/community] should be with emergency repair crews to prevent further complications.
8. AC can’t cool all rooms equally
If some areas of your home feel hot while others are cold, you may have problems with uneven cooling in your AC. Blocked air, ductwork problems, or thermostat issues could be to blame. Our team in Pune, Pimpri-Chinchwad specializes in diagnosing and fixing abnormal cooling problems.
9. Ice formation on AC units
Ice in your AC unit is usually caused by low ventilation or low coolant levels. This can cause serious damage to the compressor if not addressed immediately. If you notice ice on your AC unit in Pune, turn it off and call a professional AC repair service.
10. The part is more than 10 years old
Regular maintenance can the life of your AC, and most units begin to lose performance after 10 years. If your AC is more than old and breaks frequently, it is time to replace it. Consult with an AC technician to determine if repair or replacement is the best option.
Why Choose Professional AC Repair in Pune and PCMC?
When dealing with AC issues, timely action can save you from costly repairs and replacements· Here’s why residents in Pune city/ PCMC region trust our AC repair services:
Quick Response Time: We understand the urgency of AC problems, especially during hot summer months·
Experienced Technicians: Our skilled professionals are trained to handle all types of AC repairs, from minor issues to complex problems·
Affordable Pricing: We offer competitive rates for AC repair services in pune without compromising on quality·
Local Expertise: As a locally-owned business in pune, we understand the specific cooling needs of the area·
Tips to Prevent Future AC Repairs
Schedule Regular Maintenance: Have your AC serviced at least once a year to keep it in optimal condition·
Change Air Filters Regularly: Replace air filters every 1-3 months to proper airflow and reduce strain on your system·
Clean the Outdoor Unit: Keep the area around your outdoor AC unit clear of debris and dirt·
Monitor Your Thermostat Settings: Avoid extreme temperature settings to prevent overworking your AC·
By following these tips, homeowners in pune can enjoy reliable and efficient cooling throughout the year·
Contact Us for Reliable AC Repair in Pune
If you are experiencing any of these warning signs, don’t wait until the problem gets worse· At repair business, we provide fast and reliable AC repair services in Pune, PCMC, ensuring your home stays comfortable and cool.
Call us now at 8888797157
Visit our website: www.quickfixs.com
Don’t let AC problems disrupt your comfort – schedule your repair service today!
Top 10 Common Geyser Problems and How to Fix Them

Top 10 Common Geyser Problems and How to Fix Them
A geyser is an essential appliance in every home, providing hot water for various daily activities. However, like any other household equipment, geysers can sometimes face issues that may disrupt their performance. If your geyser is acting up, it’s important to address the geyser problem quickly to avoid further damage and ensure your hot water supply remains uninterrupted. In this blog, we’ll discuss the top 10 common geyser problems and how to fix them. Additionally, if you need professional assistance, our geyser repair services are available to ensure that your geyser is functioning optimally.
1. No Hot Water
One of the most common issues with geysers is a lack of hot water. This can be caused by several factors, such as a tripped circuit breaker, a faulty thermostat, or a broken heating element.
How to Fix It:
– Check the circuit breaker to ensure it’s not tripped. If it is, reset it.
– Inspect the thermostat setting. If it’s too low, increase the temperature.
– If the heating element is damaged, it may need to be replaced. In this case, you may need geyser repair services to replace the faulty element.
2. Water is Too Hot or Too Cold
If the water temperature fluctuates between hot and cold, it could be a sign of a malfunctioning thermostat or a sediment buildup in the tank.
How to Fix It:
– Adjust the thermostat to the desired temperature.
– If sediment has accumulated at the bottom of the tank, flush the geyser to remove the buildup.
3. Geyser Leaking Water
Water leakage from the geyser is another common geyser problems. This could be due to a damaged tank, worn-out valves, or a broken seal.
How to Fix It:
– Inspect the geyser for any visible cracks. If you find any, the tank may need to be replaced.
– Check the inlet and outlet valves to ensure they are tightly sealed. Replace any worn-out seals.
– Call a professional for geyser repair if the leakage is severe.
4. Geyser Making Strange Noises
If your geyser starts making strange sounds, such as rumbling or popping noises, this could indicate a buildup of sediment at the bottom of the tank.
How to Fix It:
– Flush the geyser to remove the sediment. This will usually resolve the noise problem.
– If the noise persists, it may indicate an issue with the heating element, which might need to be replaced.
5. Geyser is Not Heating Water Quickly
If your geyser is taking longer than usual to heat water, it could be due to a faulty thermostat or a buildup of mineral deposits.
How to Fix It:
– Check and adjust the thermostat to ensure it is set correctly.
– If sediment has built up, perform a regular geyser cleaning to remove any blockages.
6. Water Discoloration
If the hot water comes out discoloured, it could be due to rust or corrosion inside the geyser.
How to Fix It:
– If the internal tank is rusted, you might need to replace it.
– Flushing the geyser can help remove any rust buildup from the system.
7. Low Water Pressure
Low water pressure can be caused by some things, including mineral deposits in the geyser or issues with the inlet valve.
How to Fix It:
– Clean the geyser’s inlet valve and ensure that it is not blocked.
– Flush the geyser to remove any sediment buildup that may be obstructing water flow.
8. Geyser Trips the Circuit Breaker
If your geyser frequently trips the circuit breaker, it could be a sign of an electrical problem, such as a short circuit or faulty wiring.
How to Fix It:
– Inspect the geyser’s wiring for any signs of damage. If the wiring looks compromised, contact a professional to repair or replace it.
– If the issue persists, call a geyser repair technician to assess and fix the problem.
9. Geyser Smelling Foul
A foul smell from your geyser can indicate bacterial growth, especially if the temperature is set too low.
How to Fix It:
– Increase the thermostat temperature to kill any bacteria.
– Regularly clean the geyser and flush it to prevent further bacterial buildup.
10. The geyser is Overheating
If your geyser is overheating, it could be due to a faulty thermostat, a damaged heating element, or electrical issues.
How to Fix It:
– Check and reset the thermostat to prevent overheating.
– If this geyser problems persists, you may need to replace the thermostat or heating element.
Conclusion
While some geyser problems can be fixed easily with basic troubleshooting, others require the expertise of a professional. If you are unable to resolve the issue on your own or if you need more complex repairs, don’t hesitate to contact our geyser repair services. We offer reliable and efficient geyser repair solutions to keep your geyser in top condition, ensuring you never have to go without hot water. For more information or to schedule a service, call us at +918888797157.
10 Common Symptoms Your AC Needs Fixing Before Summer
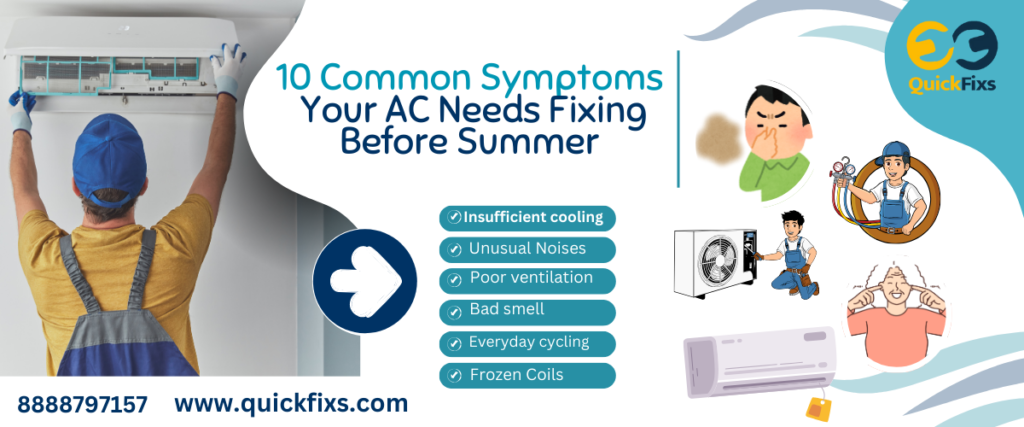
10 Common Symptoms Your AC Needs Fixing Before Summer
As summer approaches, the last thing you want is to run a failing air conditioner in extreme heat. To avoid this, inspecting your AC unit and identifying potential problems early is important. Identifying problems early can save you from costly repairs or other expenses and ensure your home stays cool and comfortable. Here are 10 common signs that your AC may need maintenance before summer arrives, along with detailed explanations to help you understand the causes and solutions.
1. Insufficient cooling
If your AC is working but can not cool your space properly, this is a clear sign of trouble. This can be due to several factors
Refrigerant leaks: Low levels of refrigerant can prevent your AC from cooling.
Dirty Air: A filter blocks the flow of air, making it difficult for cold air to pass the system.
Faulty compressor: The heart of your AC unit, and if it does not work, the performance of the entire system.
Initiate air filter repair or replacement to correct improper cooling. If the problem persists, it is a good idea.
2. Unusual Noises
Rattling, and buzzing noises coming from your AC unit are abnormal and often indicate mechanical problems. Here are some common causes
Loose Components: Over time components such as fan blades can become loose and create rattling sounds.
Worn-Out Bearings: Buzzing noises may be due to worn-out motor bearings.
Remains in the System: Twigs, leaves, and other debris can get lodged in the system, causing unusual sounds.
Ignoring these noises can lead to more severe damage. A technician can inspect the unit, tighten loose components, and remove debris to restore normal operation.
3. Poor ventilation
If the air coming out of your airways is thin, it could indicate underlying issues such as.
Clogged lines: Dust, debris, and even insects can clog airways and restrict airflow.
Failure Blower Motor: The blower motor pushes the air through the vents. If it doesn’t work properly, there will be poor ventilation.
Air Pollution: Once again, clogged filters can block the flow of air.
Not only does poor ventilation reduce cooling efficiency, it also puts additional stress on your AC system. Regular duct cleaning and timely filter changes can help prevent strong gases.
4. Bad smell
Bad smells coming from your AC can indicate some problems
Moisture growth: Accumulation of moisture in the tanks or in the unit itself can lead to mould growth.
Burnt wires: A burning smell usually indicates electrical problems such as faulty wires or overheated items.
Dirty coils: Dust and dirt on the coils can cause an unpleasant odour when the system is running.
It is important to deal with odours quickly, as mould and electrical issues can pose health and safety risks. Identify the source of the odour and schedule a professional cleaning inspection.
5. Everyday cycling
If your AC is constantly on and off, it’s known as light cycling. This issue may occur due to:
Thermostat problems: A faulty thermostat can read the temperature incorrectly, causing the AC to cycle improperly.
Refrigeration issues: Low refrigeration levels can make the system work harder, allowing for constant cycling.
Oversized unit: An AC unit that’s too big for your space can cool the room faster and shut it down earlier.
Not only does a lighter bike reduce performance, it also causes more damage to your system. A technician can diagnose the cause and suggest appropriate solutions, such as re-evaluating the thermostat or adjusting the refrigerant level.
6. Superior Energy Act
Heavy usage without a sudden spike in your electric bill usually indicates a malfunctioning AC system. Potential culprits include:
Dirty holes: Blocked filters force the system to work harder, consuming more energy.
Duct leaks: Leaks in the ductwork can allow cold air to enter, causing energy loss.
Ageing factors: Older systems lose performance over time and may require more energy to produce the same amount of cooling.
Regular maintenance, such as cleaning filters and filters, can improve efficiency and reduce energy costs.
7. Leaking water or refrigerant
Moisture that collects around your AC or refrigerator leaks are major red flags. The most common causes are:
Clogged drains: The condensation can clog debris or mud, causing water to back up.
new drier coil: Worn coils can cause refrigerant leaks, affecting cooling efficiency.
Broken pump: If the pump responsible for circulating condensate water breaks, water can accumulate around the unit.
Neglecting leaks can lead to water damage and system failure. Technicians can repair the drains, adjust coils, and repair the pump.
8. Thermostat problems
If your AC can not handle the thermostat setting or produces inconsistent heat, the thermostat may be a problem. Common problems include
Incorrect calculation: A poorly calculated thermostat can read temperature incorrectly, causing inconsistent cooling.
Wiring problems: Damaged wiring can meddle with communication between the thermostat and the AC unit.
Older thermostats: Older thermostats may not be compatible with modern AC systems.
Switching to a programmable gives you more accuracy and more control over your AC.
9. Frozen Coils
Ice build-up on your AC’s coils can indicate several problems
Unlimited Airflow: Dirty filter ducts can reduce airflow, causing the coils to freeze.
Low Refrigerant Levels: Insufficient refrigerant can cause the coils to cool excessively and freeze.
Faulty Fan: A other words fan may not circulate enough air to prevent freezing.
10. Life of the unit
Your AC is over 10-15 years old and needs maintenance, time to consider replacing it. Older units are to fail, leading to higher maintenance and energy costs.
What you should do next
Ignoring these signs can lead to total system failure and costly repairs during the busy summer months. Scheduling professional maintenance and repairs can help ensure your AC is in top condition before the heat kicks in. Additionally, the investment in routine maintenance can prevent many of these issues in the first place.
Why Regular AC Maintenance Matters
Routine maintenance offers numerous benefits.
Enlarged Lifespan: Care can add years to your AC unit life.
Improved Efficiency: A well-maintained system uses less energy, saving you money on bills.
Improved Comfort: Regular tune ensures consistent and effective cooling.
Smaller Repairs: Preventive maintenance helps catch small issues before they become major problems.
Final Thoughts
If you notice any of these signs, contact a reliable AC repair service today to keep your home cool and comfortable all summer long.
Regular and timely maintenance can protect you from unexpected problems and ensure your AC is working properly.
Window AC vs Split AC: Which One to Choose?

Window AC vs Split AC: Which One to Choose?
Given the variations in air conditioning systems, the decision to have the right type for the house or office becomes extremely challenging. The two most prevailing types include Window ACs and Split ACs. Both are quite effective in the process of cooling space but vary on all fronts-from design and installation to performance and cost. This blog will give you a clear view of the differences between Window AC and Split AC so that you can decide wisely for yourself.
1. Design and Configurations
Window AC:
A Window AC is a single-unit system that contains all the components, the compressor, condenser, and evaporator, packaged together in one compact box.
It can be installed through a window or a wall opening designed for the AC.
Window ACs have simple configurations. Installing and maintaining them is thus not very complex.
2. Split AC:
A split AC has two individual units an indoor unit and an outdoor unit.
The indoor unit is mounted on the wall. It has been mounted to an outdoor part at the exterior of some building.
Split ACs have an almost attractive and quite sleek appearance that absorbs well with interior decor.
2. Cooling Performance:
Window AC:
Suitable for smaller spaces such as single rooms or compact office spaces.Provides effective cooling for areas with limited square footage.May struggle to cool larger spaces efficiently.
Split AC:
It is ideal for cooling larger spaces or multiple rooms. Equipped with advanced features like faster cooling, better air distribution, and higher energy efficiency.
Many models include inverter technology for consistent cooling.
3. Installation requirements:
Window AC:
- Installation requires a dedicated window or wall opening.
- The installation process is easy and doesn’t take much time.
- It may not be suitable for homes without adequate window space.
Distributed AC: - Personnel must be installed, including installation of indoor filters, installation of outdoor filters and connecting the two filters with refrigerant piping.
- Installation can be very complicated and time-consuming.
- It allows for flexibility in placement because it is not dependent on window space.
Increased noise levels
Window AC:
- Because all the components are housed in a single package, window ACs tend to produce a lot of noise during operation.
- Noise can be destructive, especially in bedrooms or classrooms.
- Distributed AC:
- Split AC is quieter because the noisy components (compressor and condenser) are located outside the building.
- Ideal for noisy environments such as bedrooms, offices and libraries.
- Energy Efficiency
Window AC:
- Window ACs are less energy-efficient than split ACs.
- Basic models may consume more electricity, leading to higher utility bills.
Split AC:
- Split ACs, especially those with inverter technology, are more energy-efficient.
- Inverter models adjust cooling capacity based on room temperature, reducing energy consumption.
- Though initially expensive, they result in significant energy savings over time.
Cost Comparison
Window AC:
- Generally, it is more affordable in terms of initial purchase cost.
- Installation costs are lower due to the simpler setup.
- Maintenance costs are also relatively low.
Split AC: - Higher initial purchase cost compared to Window ACs.
- Installation costs are significantly higher due to the setup.
- Maintenance costs can vary depending on the model and usage.
- Aesthetic Appeal
Window AC:
- Bulky design that protrudes from the window or wall, which may not blend well with modern interiors.
- Limited colour and design options.
Split AC: - Sleek and stylish design that complements contemporary interiors.
- Available in various colours and finishes to match your decor.
- Portability and SpaceWindow AC:
- Compact and portable; can be easily uninstalled and relocated.
- Requires minimal space but takes up window area.
Split AC: - Not portable; once installed, it’s challenging to relocate.
- Does not occupy window space, making it ideal for rooms without windows.
- Durability and Maintenance
Window AC:
- Durable and long-lasting with regular maintenance.
- Easier to clean and service due to the single-unit design.
Split AC: - Generally more durable if maintained properly.
- Requires professional servicing for cleaning and repairs, which may be costlier.
- Environmental Impact
Window AC:
- Older models may use refrigerants that harm the environment.
- Less energy-efficient, contributing to higher carbon emissions.
Split AC: - Modern Split ACs use eco-friendly refrigerants and are designed to reduce environmental impact.
- Energy-efficient models further contribute to sustainability.
- Special Features
Window AC:
- Basic models with limited features.
- Some newer models include remote control, sleep mode, and energy-saving settings.
Split AC: - Advanced features like Wi-Fi connectivity, smart controls, air purification, and humidity control.
- Many models are compatible with home automation systems.
Pros and Cons Summary
- Window AC Pros:
- Affordable initial cost.
- Easy to install and maintain.
- Compact and portable.
- Window AC Cons:
- Noisier operation.
- Limited cooling capacity for larger spaces.
- Less aesthetic appeal.
- Split AC Pros:
- Quiet operation.
- Better cooling performance and air distribution.
- Energy-efficient, especially with inverter technology.
- Modern design and advanced features.
- Split AC Cons:
- Higher upfront cost and installation expense.
- Requires professional maintenance.
- Not portable.
conclusion:
Choosing a window AC and a split AC ultimately depends on your specific needs, budget and preferences. If you need an inexpensive option that is easy to install in a small room, a Windows AC might be the right choice. On the other hand, if you are looking for powerful cooling, energy efficiency and modern features, the Split AC is worth the investment.
Consider factors such as room size, noise perception, energy consumption, and aesthetics before making a decision. With the right air conditioner, you can enjoy the beautiful and efficient cooling you need.
Advantages of outsourcing the mixer repair services

Advantages of outsourcing the mixer repair services
Mixers are appliances that make life much easier when it comes to issues like kneading, whipping, and mixing in every household or commercial kitchen. The machines conserve time and energy, especially regarding such labor. But like all other appliances, the mixer will also have its time when it will start to breakdown, thus making problems at the same time when it will start weakening the efficiency of an appliance. The question is now before the eyes of many, whether to fix a mixer on their own or to hire a professional to do the task. Fixing it on your own is always so tempting; however, opting for professional repair services yields so much more to the advantage.
In this blog, we’ll explore the numerous advantages of hiring experts for mixer repair services and why it’s the smarter choice for preserving your appliance’s longevity and performance.
1. Accurate Problem Diagnosis
Perhaps, the most evident benefit of seeking a professional for help is the correct diagnosis. A mixer is one of those kitchen appliances that seems intimidating with most of its parts appearing to be motors, gears, switches, and electrical systems. Sometimes, an infinitesimally small malfunction in one place creates a wave effect throughout the entire appliance.
The professional has experience and equipment to pinpoint the cause of the problem. He does not treat the symptom but digs out the source and makes sure your mixer functions as good as it was on its first day.
2. Special tools and parts availability
High likelihood: A mixer needs somewhat specialized tools, probably not to be found in the average homeowner’s toolbox, and the proper parts, of course, which are the right ones for the model and brand of the mixer, will fit correctly.
These tools and parts are at the disposal of professional repair technicians, which enables them to do the job efficiently. You don’t waste your time trying to find the right parts or makeshift tools that probably will harm you more than doing good; you get experts handling the job smoothly.
Maybe it costs nothing, and this is how to do it yourself. More than likely, that will cost in the long run. Probably, one would not have technical skills properly to handle, which would cause much greater damage or make the mixer totally unrecoverable.
On the other hand, professional repair services are relatively very cheap. In the first instance, the professional will repair to your taste avoiding any additional cost of creating the unnecessary damage for your appliance saving you. This probably the amount of fixing your problem will much smaller than spending money to obtain a new one.
4. Convenience Time Saving
A professional will immediately diagnose the problem and fine-tune the unit, which means saving you all your precious time. It saves a considerable amount of time for you, after which you can again resume all your routine works without much hassle. This factor of saving time is highly indispensable to mixers-dependent business houses like bakeries and restaurants.
5. Safe Operation
Mixers are electrical appliances and have moving parts. So, mishandling is likely to lead to accidents. The probability of electrical shock or cuts by sharp parts will increase when a person with no knowledge about the appliance or does not have the required tools tries to repair it.
They know how to do the repair work safely. They will thus be following established protocols and protective measures so that no one is in danger during the repair process.
6. Warranty and Value Retention
Many mixers come with a manufacturer’s warranty. The mixer is repaired for some period by them. Any Do-It-Yourself repairs may be voiding that warranty, hence you will be paying for any future repairs or replacements.
A professional ensures the fix meets manufacturers’ recommendations thus saving you a warranty.Thus, professional fixing assures that an appliance lives more than a few other appliances cared for DIY.
7. Long life in Your Appliance
This would decrease the efficiency and overall lifespan of your mixer because it is continuously getting worn out. Professional service, apart from resolving the immediate issue, also denotes preventive maintenance. Thus, it will be fine working for a long time from now.
For example, when you are in the middle of fixing your mixer, you might find that a particular worn part, before it actually develops to become an unbearable headache. Besides saving money by not needing a replacement, this is very proactive by nature.
8. Expert on all brands and models
There are too many brands, models, and designs of mixers with diverse features and specifications so that one mixer can perfectly do otherwise than another. A trained professional has much knowledge regarding various brands and models in order to bring one particular repair.
Regardless of the mixer, be it a stand mixer perhaps one of the best-selling brands or hand mixer, which is so compact-seasoned repairers understand how to do the job efficiently and accurately.
9. Quality Results and Warranty for Repairs
Quality work is one of the best reasons for hiring the professionals. In general, sound repair services will give you warranty on repairs that assure you it won’t come up again sooner.This means that if such a problem happens, it will be repaired free by a technician before the warranty is over. You cannot get something like that when you are planning to do it yourself.
10. Eco-Friendly Environment
A ‘green’ action you would take is to ensure that your mixer is sent for professional repair instead of dumping it. This ensures it is not sent to electronic waste, while its carbon footprint is reduced due to its being given a new lease on life.
Most services handling repairs ensure broken used parts are disposed of to further enhance ‘ecofriendly practices’.
Conclusion
When your mixer, for example, starts showing signs of problems it becomes very tempting to just put on your tool-belt and start fixing it DIY. However, the risks in breaking something more damaging and hence losing a warranty or violating your safety far outweigh the perceived value.
The longer it saves in using professional mixer repair services is from that expertise and reliable solutions. Anything from an attempt to troubleshoot even the most challenging problems down to ensuring your mixer will run at its potential capacity will be done perfectly; thus, more time-saving plus more accurate.hence , timely mixer repairs is the most important aspects to keep your mixer for lifelong .
Is Reverse Osmosis Water Safe for Drinking? Myths vs. Facts

Is Reverse Osmosis Water Safe for Drinking? Myths vs. Facts
Clean drinking water is essential for a healthy life, and reverse osmosis (RO) water filters have become a popular choice for many families and businesses. But as with any technology, there are some misconceptions that lead people to doubt its effectiveness and safety. In this blog, we will clear up some common myths about RO water and share real-life experiences to help you understand why it’s a safe and reliable option.
Myth 1: Reverse Osmosis Water Lacks Essential Minerals and Is Unhealthy
The Myth
Some people say that RO water is “dead” because it removes both harmful contaminants and healthy minerals, making it unsuitable for drinking.
The Reality
While it’s true that RO filters remove most minerals, this isn’t necessarily bad. The main purpose of water is to keep you hydrated, and your body gets most of its essential minerals from food, not water. For example, a person who eats fruits, vegetables, and dairy regularly already gets enough calcium and magnesium. Many families using RO systems for years have reported better-tasting water and fewer health concerns related to contaminants like lead or arsenic, which RO systems effectively remove.
Myth 2: RO Water Is Too Acidic to Be Safe
The Myth
Some believe that the water from an RO filter is too acidic and can harm your body over time.
The Reality
RO water may have a slightly lower pH, usually between 5 and 7, which is similar to the pH of beverages like coffee or orange juice. This minor acidity is not harmful. For those who prefer a more balanced pH, many RO systems now come with a remineralization filter that adds back essential minerals and improves alkalinity. A friend of mine, who was concerned about acidity, added such a filter to her RO system and noticed no issues—only clean and refreshing water every day.
Myth 3: Reverse Osmosis Wastes Too Much Water
The Myth
Critics often argue that RO systems waste a lot of water, making them bad for the environment.
The Reality
Yes, RO systems produce some wastewater, but modern models have become much more efficient. Many systems now recover 50% or more of the water they process. Plus, you can reuse the wastewater for non-drinking purposes like watering plants or cleaning floors. My neighbor installed an RO system and cleverly redirected the wastewater to her backyard garden. Her plants are thriving, and she feels good about using her water responsibly.
Myth 4: RO Water Is Completely Pure and Free from All Contaminants
The Myth
Some people believe RO systems remove every single impurity, making the water 100% pure.
The Reality
While RO systems are highly effective—removing up to 99% of contaminants like chlorine, bacteria, and heavy metals—no filtration system can guarantee absolute purity. For example, certain volatile organic compounds (VOCs) or dissolved gases may not be entirely removed. Pairing your RO system with a good carbon filter ensures even better results. My cousin, who works in water treatment, says his RO system with a carbon pre-filter has consistently delivered safe, clean water for his family of four.
Myth 5: RO Water Is Unnatural and Unsafe for Daily Use
The Myth
Because RO water undergoes extensive filtration, some argue it’s unnatural and therefore not good for everyday consumption.
The Reality
On the contrary, RO water is one of the safest options available. It removes harmful pollutants like pesticides, bacteria, and heavy metals, ensuring your family drinks clean water. Think of it like rainwater, which gets naturally filtered through the earth. Many parents I know choose RO water for their kids to protect them from health risks associated with contaminated tap water.
Conclusion: Myths Debunked
Reverse osmosis water is not only safe but also one of the best ways to ensure your family gets clean drinking water. Despite concerns about minerals, pH levels, and waste, the facts show that the benefits far outweigh any drawbacks. Families using RO systems often share stories of improved health, better-tasting meals, and peace of mind knowing their water is free of harmful contaminants.
If you’re considering an RO system, look for one that fits your needs—whether it’s a compact model for small spaces or a system with a remineralization filter for added benefits. Clean water is a basic necessity, and reverse osmosis technology ensures you get just that—pure, safe, and refreshing.


